Setting Up LightGallery on a Jekyll Website Hosted by Github Pages

As I mentioned in the “What is this blog?” post, I want this website to serve as both tutorials/documentation for myself, while also being a portfolio of my projects. Having recently travelled to Japan, I wanted a nice way to display my photos in a nice carousel, with a gallery of thumbnails that I could embed in a blog post.
Lightgallery is the best way to achieve this. For personal use, it’s free, and it is a very powerful (and professional-looking) tool to display and offer downloads to your photos. Many websites and blogs use it, so you’ve probably seen it before without even knowing it.
Github Pages Doesn’t Like Plugins
Github pages doesn’t like plugins. They like some plugins, but not all plugins. if you add a gem to your gemfile that isn’t on Github’s supported list of plugins, Github will fail to build and publish the website.
In order to get things working, I recommend you switch over to Github Actions for deploying your site. It’s necessary for some of the gems we need, so you should get it working before changing any of your underlying website code. Jekyll’s docs are great for this, and the relevant tutorial can be found here.
The error I ran into here was something strange about a date in a markdown file in the \vendor\ directory, which doesn’t even exist when I build the website locally. Either way, this can be fixed by adding simply the word “vendor” to the “excludes” list in _config.yml.
Installing the Necessary Plugins
The way I figured out the rest of this was mostly by following Jimmy Xiao’s blog post describing the process. HUGE thanks to him for his work, I never could’ve gotten such an easy-to use solution without his work. However, I ran into a variety of issues, likely due to my amateurish skills with this sort of thing. As such, I am going to describe exactly what I did, in order, to get this up and running on Github Pages.
Firstly, you’ll want to install ImageMagick. ImageMagick is an open-source image manipulation command line tool. As I’m on a Mac, I installed it using the package manager homebrew with brew install imagemagick. If you’re on a Mac and have never installed a package manager, you’ll have to install brew or something similar. This is straightforward and instructions are available on homebrew’s website. Other download instructions exist here for other operating systems.
Then, you’ll want to download the ruby gems exiftag.rb and jekyll_minimagick.rb. exiftag.rb is a plugin that extracts metadata from the images you want in your gallery (we’ll get to that later). The jekyll_minimagick.rb uses the program ImageMagick to automatically convert the images we want in our gallery to small, easy-to-load thumbnails. Put these both in the _plugins folder in the root of the directory of your jekyll project. If there isn’t one, don’t worry, just create one and put the files in.
Now we want to make sure we install the necessary gems. Open your gemfile and add these two lines anywhere in the file:
1
2
gem "mini_magick"
gem "exifr"
Then (if you’re using bundle, which hopefully you are) run bundle install in the root of your project and the gems should install.
Installing Lightgallery
Installing lightgallery is easy using npm, yarn, or bower. I recommend using npm, as that’s what I’m familiar with. Make sure you initialize your directory (the root of your jekyll project) using npm init and then install lightgallery with npm install lightgallery.
File Structure
This is very important. I had tons of file structure issues for some reason that took hours to figure out, but I think I got it. Here is what my file structure looks like:
1
2
3
4
5
6
7
8
9
10
11
12
13
14
├── _includes
│   └── album.html
├── _layouts
│   └── layout-with-gallery.html
├── _plugins
│   ├── exiftag.rb
│   └── jekyll_minimagick.rb
├── _posts
│   └── 2024-08-29-setting-up-lightgallery.md
└── assets
    └── images
        └── gallery
            └── galleryNameHere
                └── my-picture.jpg
Album.html and Layout-with-gallery.html
My version of album.html is a slightly tweaked version of Jimmy Xiao’s, but the underlying functionality is the same. The code is here:
1
2
3
4
5
6
7
8
9
10
11
12
13
14
15
16
17
18

<div id="{{include.albumname}}">

    {%- for image in site.static_files -%}
    {%- if image.path contains 'images/gallery' and image.path contains include.albumname -%}
    {%- unless image.path contains 'thumbnails' -%}
    <a href="{{ image.path }}" data-sub-html="{% exiftag image_description, , {{ image.path }} %}">
        <img src="/thumbnails{{ image.path }}" />
    </a>
    {%- endunless -%}
    {%- endif -%}
    {%- endfor -%}

</div>
<script type="text/javascript">
    lightGallery(document.getElementById("{{include.albumname}}"));
</script>
I’ll try to describe to the best of my ability what’s going on here. This first element is a div that contains the images for lightgallery. Lightgallery works in two steps: first, you create a simple div that contains your images, which are set up as links (as you can see above) with an image tag between the two <a> tags. This div has an id that you can refer to later. The second step is actually running the lightgallery script and feeding it the id of the div that contains your images.
Here, we want this album.html to take an argument called albumname when it’s ‘called’. I’m saying ‘called’ in quotes because I have no idea what the proper terminology is for embedding an html file inside another. But either way, when we ‘call’ album.html, we pass the albumname argument to be used as the id for the div. Then the Liquid code loops through all the images on the site, and searches for paths that contain images/gallery AND the album name. This allows us to use this for different album names (folders of pictures) inside the images/gallery folder. Because we also created thumbnails for these in another folder with a similar path, we want to use the Liquid command unless to avoid double-counting images.
The link and image are pretty straightforward, except for the data-sub-html section. This is where we ‘call’ exiftag, which can read the description from the image specified at image.path. In this case, we want the description, so we pass image_description as an argument.
Now how does lightgallery interpret all of this? The link specified by the href is going to be the full-size image that lightgallery serves once the thumbnail is clicked. The image between the <a> tags should be the thumbnail, which is what we want to display on the actual page before it is clicked.
As for layout-with-gallery.html, this should be one of your existing jekyll layout files in _layouts. The following code should be put at the top of this file, or really just anywhere before your content from your markdown file is read-in:
1
2
3
4
<!-- lightgallery Stuff -->
<script src="/node_modules/lightgallery/lightgallery.umd.js"></script>
<script src="/node_modules/lightgallery/plugins/thumbnail/lg-thumbnail.umd.js"></script>
<script src="/node_modules/lightgallery/plugins/zoom/lg-zoom.umd.js"></script>
In order for this to work, we must also add these lines to the <head> of the default layout, which is usually just called default.html:
1
2
3
4
<head>
    <!-- Stuff for lightGallery -->
    <link type="text/css" rel="stylesheet" href="/node_modules/lightgallery/css/lightgallery-bundle.css" />
</head>
lightgallery-bundle.css includes various lightgallery tools that we want.
Calling album.html
Finally, we can use this in our markdown files. First make sure that your layout is set to layout-with-gallery.html in your markdown file’s YAML front matter. Then you can simply add the album with lightgallery using this line:
1
2
3

{% include album.html albumname="your_album_name_here" %}
Ah, finally, beautiful galleries
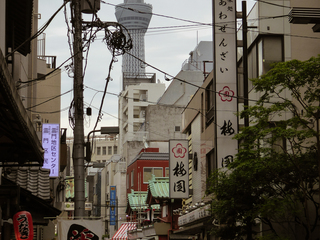
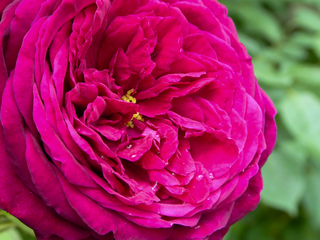
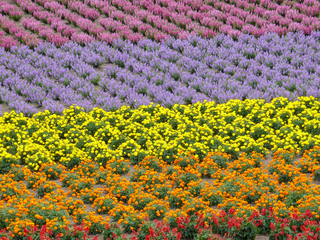
Here, you can see this working:
There’s still some slight formatting gripes I have (like why isn’t it centered?), but it works well enough that I’m satisfied. If anything isn’t working for you, feel free to download this entire website as a folder using one of those online website downloader tools so that you can look at the code yourself.
Thanks for reading and happy coding!

